I start with super glue

An empty tea bag,

and a nail buffer.

I cut a small piece of the tea bag to place on top of the crack.


I then place a drop or two of glue on the square and as it dries I tap it down with the end of a paperclip so the edges dry flat to the surface.
It looks real bad, but here it is after it dries:


When it is completely dry, and I mean completely, I start buffing it down. Sometimes I add more than one square, and when I do it's pretty thick. In that case I will start with a course buffer to level it out. But usually a very fine buffer works well. You don't want to thin out your nail so be careful to buff just the glued area.
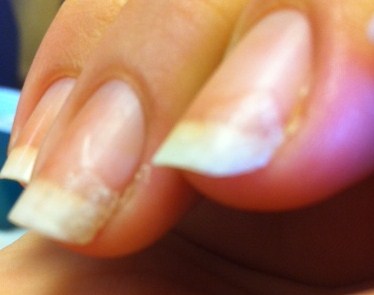
This is what my final product looks like:


I works for me! I will paint them this weekend and you will see that you can't even tell!
Thanks for checking it out!
Happy Painting!
Very interesting.
ReplyDeleteIt looks great! Thanks a lot for sharing! My nails are very thin and tend to break easily. Also, housekeeping and volleyball don't help with maintaining long, beautiful nails either... so I'll surely be using this trick veeeery soon! ;)
ReplyDeleteAs you can see in later posts, you can't even tell they are patched! I love it!
ReplyDeleteThis looks amazing!!! I'm so gonna try it.
ReplyDeleteI tried it and it didn't work for me
ReplyDelete